Woven Blanket Cape: a project collaboration with Schacht Spindle Co.

We’ve teamed up with our neighbors from Colorado to bring you this pattern, made with our Nature Spun Sport on either a Schacht rigid heddle loom or a floor loom. This would be a great starter project for diving into weaving. Enjoy!
Blanket Cape
By Melissa Lunden Hankens
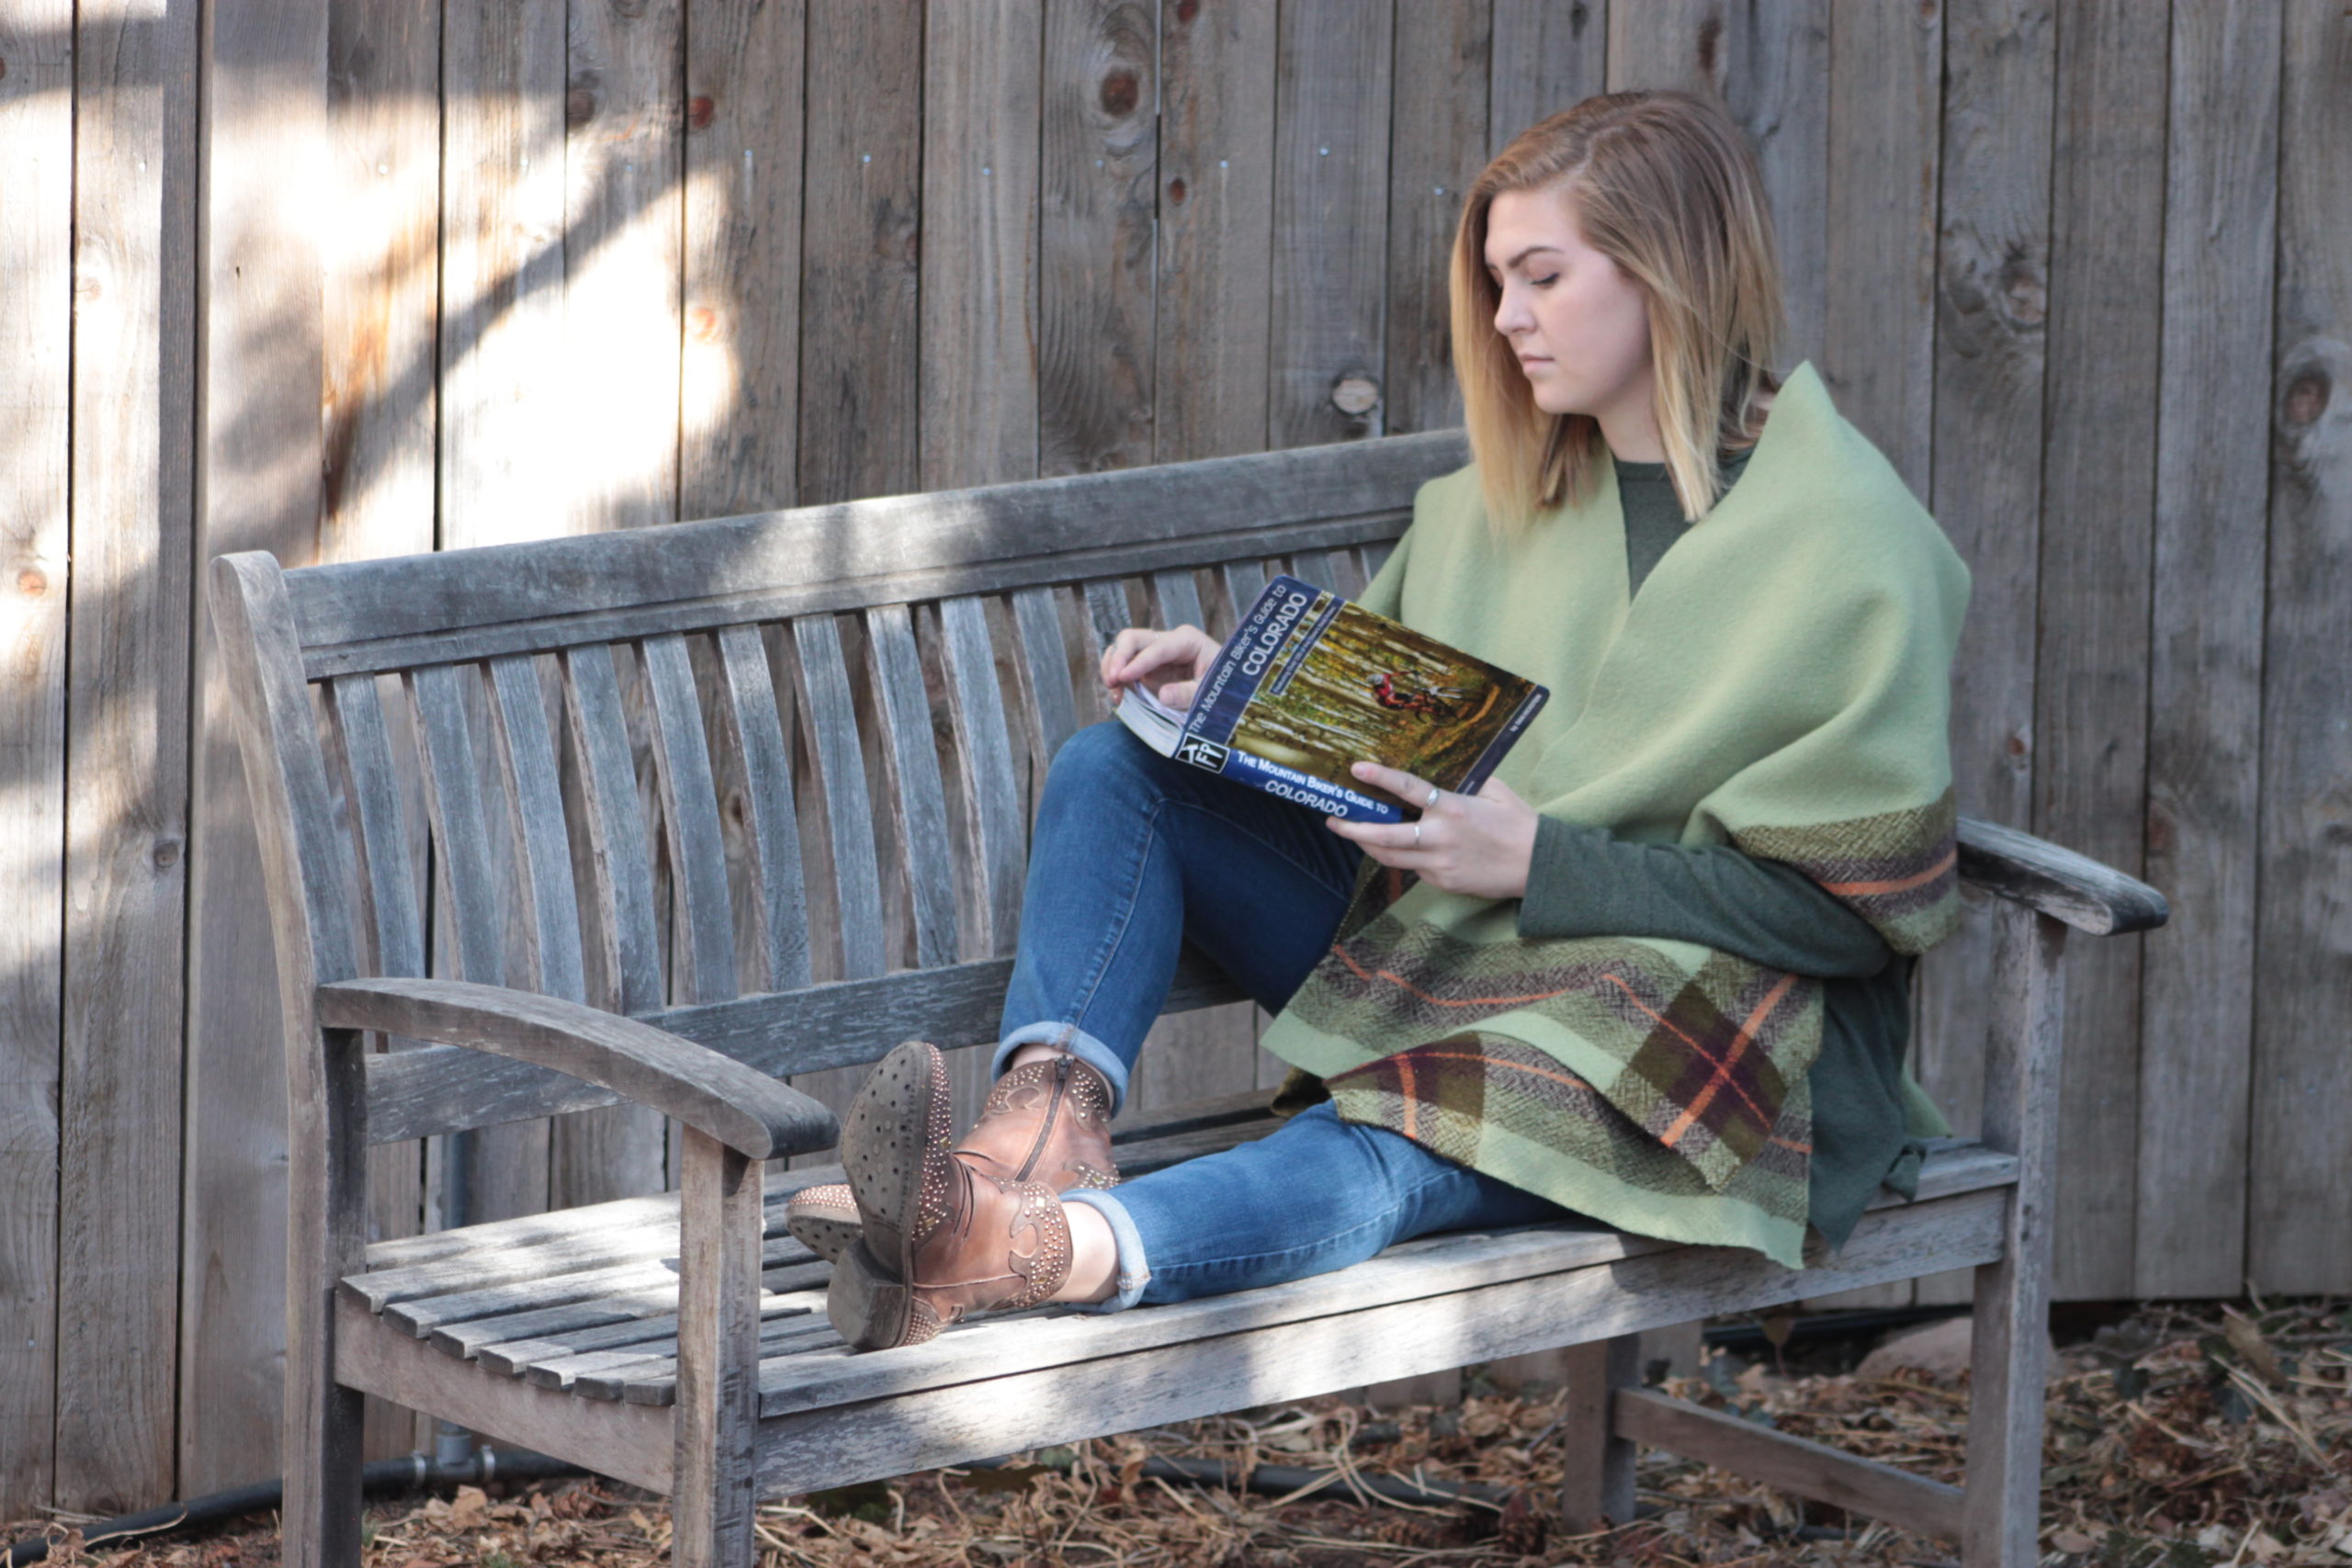
This is a simple and fabulous project to take a bit of the wind out of Old Man Winter’s sails. I don’t know about you, but when I cozy up on the couch this time of year, more often than not, a blanket is my companion. While I love a good blanket, sometimes I want to be wrapped up but have my hands free to knit or sew or scratch Pete, the cat’s, ears. Enter the blanket cape, or sweater cape, if you prefer – two rectangles of wool fabric partially stitched together to create a back with two front flaps at the ready for wrapping.
Brown Sheep Nature Spun sport weight yarn is an excellent choice for this project. It’s soft and squishy and will full to give your fabric some added density when run through the washer and dryer. The tracking that appears in the finishing process looks like some tricky weave structure but is really just the movement of the yarns in this plain weave fabric.
I wove this project on my Baby Wolf, but it could easily be woven on your 20” or 25” Flip rigid heddle loom. If you decide to weave a twill, keep in mind that you’ll need to set the warp bit more closely, thus requiring additional yarn.
Project Details
Warp length: 5 yards
Total warp ends: 302
EPI: 12
PPI: 12
Width in reed: 25”. Feel free to weave narrower fabric. A 20” wide warp will be just fine, and you may be happy with an even narrower width if you are more diminutive (hello Wolf Pup!). I’m on the taller side, and the 25” width in reed was more than generous.
Weave structure: Plain weave
For shaft looms, thread 1-2-3-4-repeat. Tie-up for plain weave is 1-3 (a), 2-4 (b). Treadling sequence is a, b, repeat.
Equipment: Schacht Spindle Baby Wolf Floor Loom. You could also weave this project on a 20” or 25” Flip Loom. You’ll also need a warping board and 4 shuttles.
Yarn: Brown Sheep Nature Spun sport weight yarn. For warp you’ll need 1,120 yards of Bamboo (light green), 240 yards of Wood Moss (brown), 120 yards of Spiced Berry (dark plum), and 30 yards of French Clay (orange). For weft you’ll need about a 1238 yards of Bamboo, 75 yards of Moss Wood, 37 yards of Spiced Berry, and 10 yards of French Clay.
These colors are just a suggestion. Keep in mind that if you are weaving this on your Flip loom, you’ll likely have less loom waste than I did using my Baby Wolf (I estimated 27” of loom waste here.) Nature Spun sport weight yarn comes reasonably priced on cones of 1,656 yards per cone or balls of 184 yards.

Warp Color Plan: 24 ends of Wood Moss, 12 ends of Spiced Berry, 6 ends French Clay, 12 ends Spiced Berry, 24 ends Wood Moss, 224 ends of Bamboo.
Weaving: Weave 30 picks Bamboo, 24 picks Wood Moss, 12 picks Spiced Berry, 6 picks French Clay, 12 picks Spiced Berry, 24 picks Wood Moss. Weave with Bamboo until you are about 6” from the end of the weave-able warp. Weave a border to match: 24 picks Wood Moss, 12 picks Spiced Berry, 6 picks French Clay, 12 picks Spiced Berry, 24 picks Wood Moss, 30 picks Bamboo.
Assembly and Finishing: After removing the cloth from the loom, I used my sewing machine to stitch along the raw edges of the fabric. I then trimmed the loom waste. You could consider a fringed edge if you’d like a bit of embellishment. If so, this stitching may not be necessary, but you should secure your fringe prior to washing. Save your thrums if you want to add extra fringe.
Fold your cloth in half length-wise to find the mid-point and mark with a pin at each edge. Then machine stitch across the fabric just above and just below the pins to create a cutting channel. You can now safely cut your fabric in half between the two lines of stitching. They will keep your new cut edges secure.
Now it’s time to do a bit of sewing. I used thread, but you could also use leftover yarn. Butt the two pieces of fabric together, right sides facing, determine which edge will be the back of your cape, and hand stitch the edges together to create the back seam. I sewed together about 1/3 of the length of the fabric, but you should sew as much as you need to create a back that fits you just right. I did a bit of extra stitching to reinforce the top of the seam, as it will get pulled at a bit as you wear your cape. That’s it! Now to the washing machine (or not)!
Please consider this more drastic step optional. I wanted a slightly denser fabric, but if you are happy with what you have, a gentle hand washing and air-drying is fine. Skipping the fulling process might be a good idea if you don’t want your fabric dimensions to shrink too much. My fabric shrank about 25% lengthwise and 20% widthwise after a run through the washing machine and dryer.
I have a front-loading machine, and I washed my cape on a regular warm setting. This was followed by a full cycle in the dryer. However, I recommend keeping an eye on your cape throughout the process, checking often. I found that this particular yarn fulls slowly at this sett. I was pleased with the end result after one run through the washer and one through the dryer.
After washing and drying, I re-cut the edges to create a clean line (the fulling should keep your threads in place). I happen to like raw edges aesthetically, and I like how the flow of fabric feels uninterrupted. You could hem your fabric either before or after washing if you like a more tailored edge or if you decide not to full your fabric and are worried about the edges fraying.
Final Dimensions: 36” width across the back, 22” back seam. Front panels: 35” long x 18” wide.
That’s it! Now fix yourself a cup of tea, pop on your blanket cape, and bid farewell to the winter chills. Happy Weaving!
Melissa Ludden Hankens
You can find Melissa designing weaving projects for the Schacht blog and Enewes. Find Melissa on the web at www.melentine.com on Twitter at Melentine (@Melentine), and on Instagram at melentine.
About Schacht Spindle Company
Schacht Spindle Company, Inc. was founded by Barry and Dan Schacht during the back-to-earth movement of the late 1960’s and its accompanying craft resurgence. Their business began by chance when a friend wanted to learn to spin. Dan and Barry had heard about Greentree Ranch in Loveland, Colorado, where they raised sheep and taught spinning. One day the brothers hopped in their van with friends and dogs and drove up to the ranch. Not only did they get a quick lesson in the art of the drop spindle, they also came home with a commission to make 200 of them.
When they delivered the spindles, the Greens were delighted, especially with the little green tree they’d hand painted on each one. Louise Green, who was just starting to weave, suggested they make a simple loom. “What’s a loom?” they asked.
In 1996, Barry’s wife, Jane Patrick, former editor of Handwoven magazine, joined the company. In 1998, Dan Schacht left the company to pursue other interests.
Barry Schacht notes that his goal from the beginning has been to make tools that work well, that will last, and that are thoughtfully and aesthetically designed. It is these ideals that continue to be the company’s guiding principles in product development and their ongoing commitment to improvement. To find out more: www.schachtspindle.com


